First decide whether the photo needs correction or a look
A handmade product photo has to show the item clearly. A warm or muted look can suit a studio story, but may be unhelpful when a buyer needs to distinguish cream yarn from white. Before comparing editors, identify what is wrong with the source: uneven lighting, a colour cast, an awkward crop or simply a visual style you want to adjust.
This guide compares our Photo Colour Editor & LUT Pack with Adobe Lightroom's documented desktop features. We sell the smaller editor, so the useful comparison is where its limits begin. The scenarios below are workflow examples, not a claim that we conducted a timed head-to-head test.
| Task | Photo Colour Editor & LUT Pack | Lightroom |
|---|---|---|
| Try a creative look on a prepared JPG | Six looks with strength, brightness and warmth controls | Presets plus more detailed editing controls |
| Adjust only one part of the image | No selective masks | Masking tools for local adjustments |
| Apply selected edits across a shoot | Work through photos individually | Copy selected edit settings to multiple photos |
| Revisit editable settings later | No saved projects between sessions | Saved edits and versions |
| Use the supplied .cube files as Lightroom presets | No XMP or DNG presets included | Use Adobe's supported preset/profile import workflow |
Adobe: Lightroom desktop editing, copying settings and versions ↗
When the small offline editor is enough
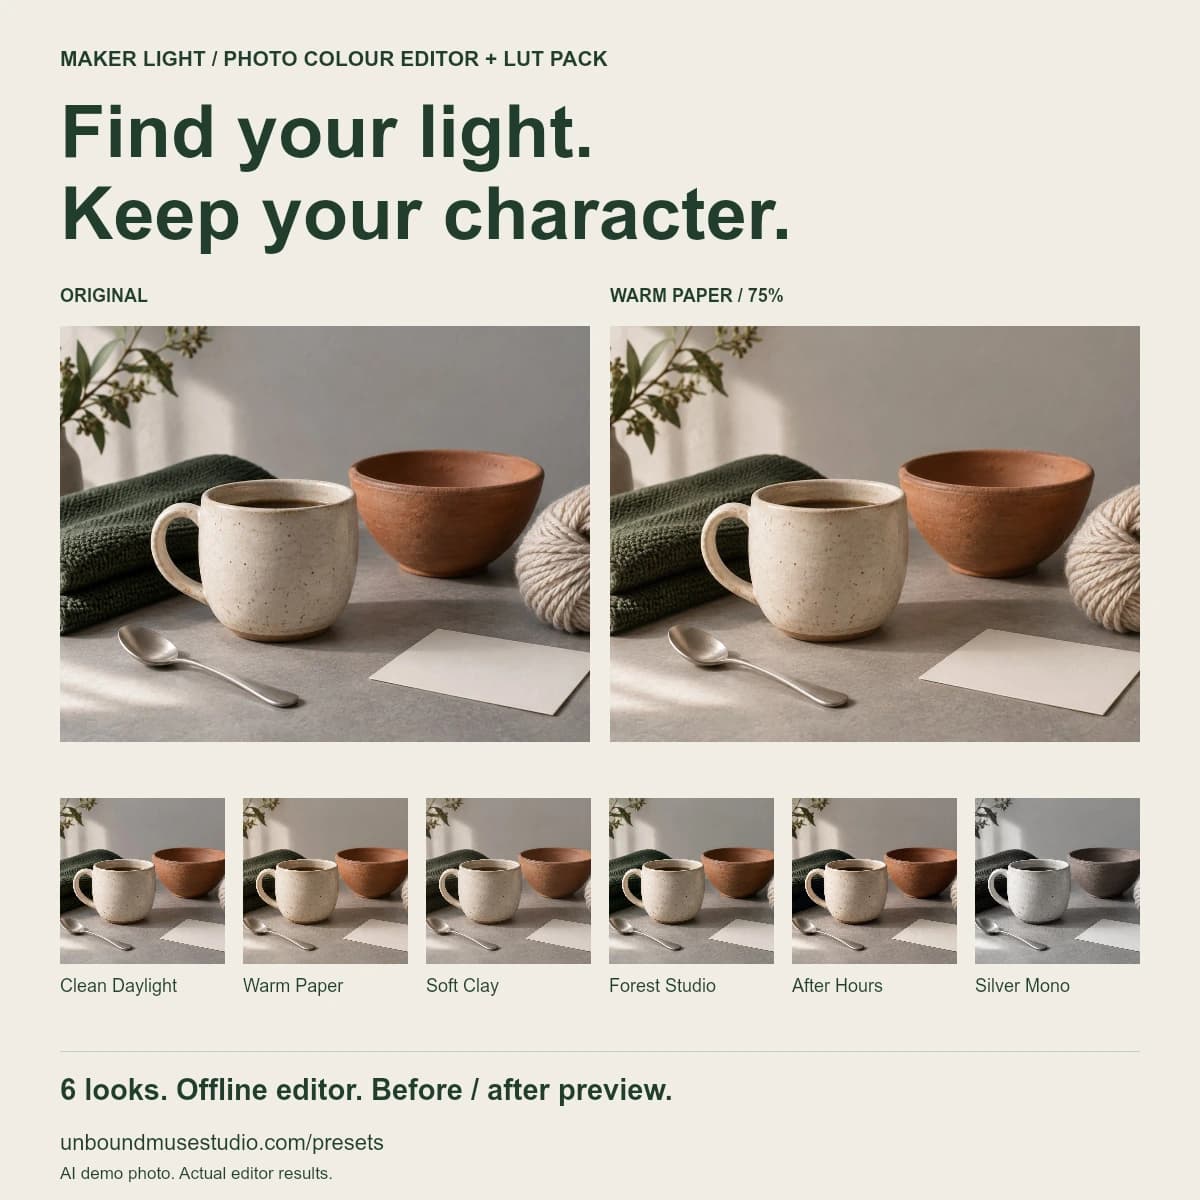
Consider a maker with three well-lit JPG photographs: a finished pouch, its packaging and a work-in-progress scene. They want to compare a softer or warmer style for a social post, lower its strength and export a copy. That is the job our editor is designed to handle.
The downloaded editor runs in a desktop browser without an account or subscription, and processes images on the device. It accepts standard SDR sRGB JPG, PNG and WebP images. Convert HEIC, RAW or HDR files before using it. Its brightness and warmth sliders are broad creative adjustments, not a substitute for a full correction workflow.
The paid kit exports JPGs at the source dimensions up to 6000 pixels on the longest edge. It does not enlarge a small image to create missing detail. The free preview has a 1200-pixel export limit. Use that preview with your own photograph before deciding whether the look is useful.
Try the free Photo Colour Editor preview with your own image →
When Lightroom is the better fit
Suppose the background needs brightening while the pale yarn must keep its texture. A change to the whole image may improve one area and spoil another. Lightroom's masks allow local adjustments, and its colour controls provide a more precise way to refine selected colours. Those are reasons to choose the fuller editor.
For a larger product shoot, Lightroom can copy chosen settings to multiple photos. Its saved edits and versions also suit work you expect to revisit. You still need to review every export; matching settings do not guarantee matching results when the lighting changes.
Lightroom also has a Local workflow for images on your device without importing or syncing them to the cloud. Do not choose our editor on the assumption that Lightroom requires every photo to be uploaded. Choose according to the controls, file workflow and ongoing editing you need.
If you already use Lightroom comfortably, start with it. Buying a separate colour tool is optional; it makes sense only if its particular looks or simpler workflow add something useful.
A .cube LUT is not an included Lightroom preset
Our kit includes six 33-point .cube LUT files alongside the editor. It does not include Lightroom XMP or DNG presets. Adobe documents preset and profile imports separately; the presence of a LUT file in a download does not establish that it can be imported directly through that workflow.
Third-party LUT imports for this pack have not been manually tested. Buy it for the included editor if you want the supported starting point. If you specifically need Lightroom presets, choose a pack supplied for your Lightroom workflow instead of assuming these files will work there.
Likewise, an exported JPG is a finished image, not a saved editing project. Our editor does not preserve EXIF or wide-gamut data in that export, and settings are not saved between sessions. Keep your original separately and record the look and slider values if you may want to repeat them.
Test one colour-sensitive product before a whole collection
Choose a photograph with a material whose appearance matters: cream cotton, warm wood or a glazed surface. Keep the original beside the edit. Start with a low-strength look, then compare the item itself under consistent light. If the cream becomes peach or a dark stitch loses definition, reduce the adjustment or leave that image unstyled.
Use a separate editorial copy when you want a stronger mood for a behind-the-scenes post. Your listing image and your studio story serve different purposes. A consistent feed is less useful if the colour a customer receives feels different from the colour shown.
Etsy's image guidance recommends sRGB for colour consistency on its site. Prepare a suitable source and inspect the uploaded result; our browser editor does not provide a colour-managed proofing workflow or guarantee how every buyer's screen will display an image.
- Check the product colour against the original and the real item.
- Inspect pale and dark details at a useful zoom level.
- Check the exported dimensions rather than relying on the preview size.
- Keep the untouched original and name the final copy clearly.
- Inspect the image in its actual listing or social crop before using it.
Choose the smallest workflow that passes your test
Use the preview if you want a quick, individual-photo colour treatment. Use Lightroom if your test reveals a need for selective correction, retained edits or work across a shoot. Keep a simpler photograph unchanged when it already shows the product well.
Photo Colour Editor & LUT Pack contains the offline editor, six looks, six LUT files and beginner guidance. If you are presenting a digital design on a device, that is a different job: Frame Studio places your existing screen images in illustrative device layouts. It does not correct product photos. Pick the tool for the output you need.